Crown molding inside vs outside corners
An inside corner wraps into the room and an outside corner wraps around a projection like a column or a chimney breast. For a square corner the miter and bevel are the same size for both, so the angles never change. What flips is the direction the saw table rotates and which side of the cut you keep. Get a perfect angle but the wrong direction and the joint still opens up.
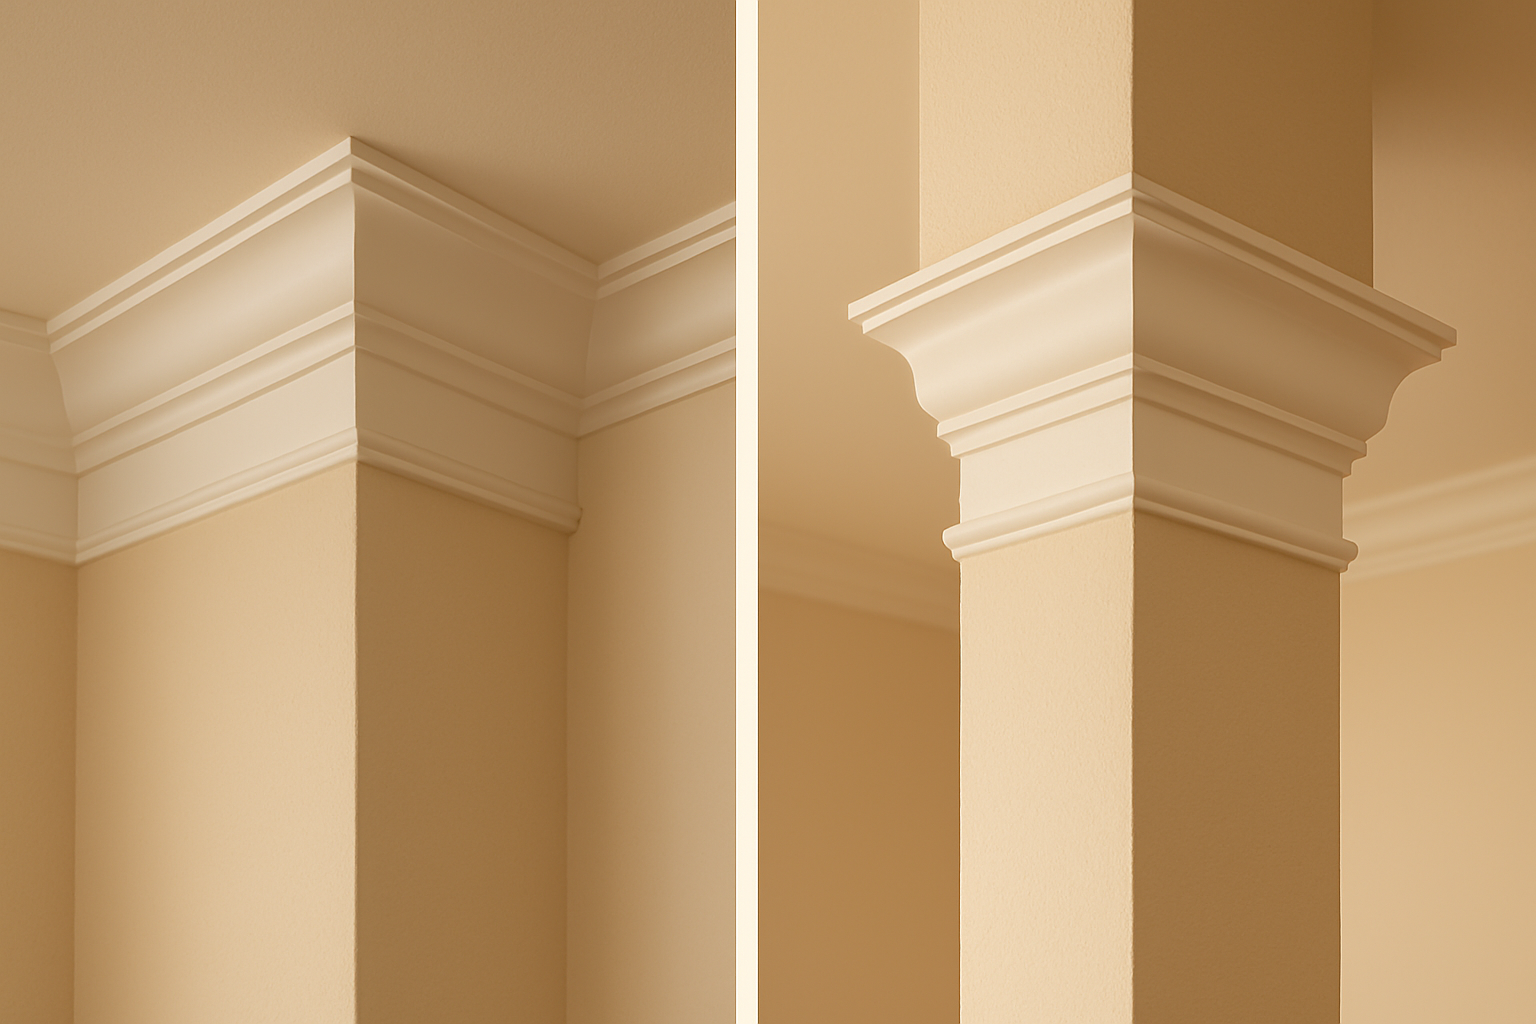
Inside and outside corners, defined
An inside corner is the one you meet most. Two walls fold toward you and the molding tucks into the angle between them, like the corner of any ordinary room. The crown lives in the concave nook where wall meets wall meets ceiling.
An outside corner is the opposite. The walls fold away from you around a projection that sticks out into the room: a boxed column, a chimney breast, a kitchen island soffit, or the return at the end of a partition wall. The molding has to wrap around the convex point, and both pieces meet on the face that everyone can see.
That visibility is the practical difference. An inside corner that is slightly off opens a gap that faces into the nook, half hidden. An outside corner that is off opens a gap that points straight out into the room, at eye level, where it is the first thing a guest notices.
The angles are the same, the direction is not
Here is the insight that makes inside and outside corners easy. For a square 90 degree corner, the miter and bevel you cut are identical in magnitude for both. You do not need two sets of numbers. You need one set of numbers and a clear head about which way the table turns and which side of the blade is the keeper.
A square 90 degree corner cut with a 38 degree spring crown laid flat uses the same settings whether it is inside or outside: a 31.6 degree miter and a 33.9 degree bevel. Only the orientation flips. The two cuts are mirror images of one another.
Source: Family Handyman, The secret numbers for cutting crown flat (familyhandyman.com).So the workflow is the same for any corner. Find your real corner angle and your molding spring angle, run them through the crown molding angle calculator for the exact miter and bevel, then apply the orientation rules below. If your corner is not a clean 90, read how to cut crown molding for odd corners, and if you are unsure of your profile, see crown molding spring angle.
The four cuts, flat on the saw
These rules assume the flat method: molding face up on the saw table, with the ceiling edge of the profile held against the fence. If that orientation is new to you, walk through how to cut crown molding flat first, because everything below depends on the crown sitting that way every time.
With the molding flat and face up, here is each piece. Think of the inside and outside cuts as mirror images of each other, and you will not get lost.
Inside corner
For the piece that runs in from the left wall, swing the miter to the right and keep the piece to the right of the cut. For the piece that runs in from the right wall, swing the miter to the left and keep the piece to the left of the cut. The two keepers meet in the nook and the joint closes inward.
Outside corner
Now mirror it. For the piece that runs in from the left wall, swing the miter to the left and keep the piece to the left of the cut. For the piece that runs in from the right wall, swing the miter to the right and keep the piece to the right of the cut. The keepers wrap around the projection and meet on the visible point.
Read those two sections back to back and the pattern is plain. Inside keeps the side toward the corner, outside keeps the side toward the wall. Same angles, opposite hands. If you ever blank at the saw, cut a short scrap first and hold it up to the corner before you commit a full length.
Mark, dry-fit, and measure for the wrap
One habit prevents most ruined pieces: mark the room-facing visible side of every piece before you cut, so you always know which face is the keeper and which way is up. Then dry-fit the joint and look at it before any nail goes in. A gap you can see dry is a gap you can fix; a gap you nail in place is a gap you have to caulk and live with.
Measuring is where outside corners trip people up. Inside pieces run to the wall and stop. Outside pieces run past the corner, because the molding has to wrap around the point before the miter begins. Measure to the corner point, the spot where the two walls break, then add length for the wrap so the piece reaches past the corner. Cut a touch long, dry-fit, and trim to a tight joint.
One more option for inside corners only: coping. Instead of mitering both pieces, you cut the first piece square into the corner and cope the second piece to nest over its profile, which hides any small wall error. Coping is an inside-corner technique. Outside corners cannot be coped, because there is no inside profile to ride against, so they are always mitered.
Sources
- Family Handyman, The secret numbers for cutting crown flat (familyhandyman.com).
- Rockler, Crown Molding Cutting Tips (rockler.com).
- This Old House, crown molding installation guidance on inside versus outside corners and coping (thisoldhouse.com).
Frequently asked questions
What is the difference between an inside and outside crown molding corner?
An inside corner wraps into the room, where two walls fold toward you, like the common corner where two walls meet. An outside corner wraps around a projection, like a column, a chimney breast, or a kitchen island soffit, where the walls fold away from you. Inside corners gap inward if the cut is off, outside corners gap outward.
Are the saw angles different for inside vs outside corners?
No. For a square 90 degree corner the miter and bevel magnitudes are identical for both. With a 38 degree spring crown cut flat, that is a 31.6 degree miter and a 33.9 degree bevel either way. What changes is the direction the saw table rotates and which side of the cut you keep, so the two pieces become mirror images of each other.
Which way do I miter for an outside corner?
For an outside corner, miter the left piece to the left and keep the left of the cut, and miter the right piece to the right and keep the right of the cut. That is the exact opposite of an inside corner. Mark the visible room-facing side and dry-fit before you nail, because an outside cut points the gap toward the room where everyone sees it.
Can I cope an outside corner?
No. Coping only works for inside corners, where one piece is cut square and the other is coped to nest over its profile. Outside corners are always mitered, because the two pieces have to wrap around the projection and meet on the visible face. There is no inside profile to cope against.
How do I measure an outside corner?
Measure to the corner point, the spot where the two walls break, then add length for the wrap, because the molding runs past the corner before the miter starts. The pieces are longer than the wall itself. Cut a little long, dry-fit the joint, and trim to a tight fit before nailing.